Since this is such a work intensive project I thought I'd give some helpful hints on issues I found quirky putting this together. In the last post we already talked about what material to use. In the meantime I tried cereal box weight chipboard and the backs of some old Stampin' Up! pads. Neither worked......they are too stiff to crease and the creases are the bugger about this IMHO!
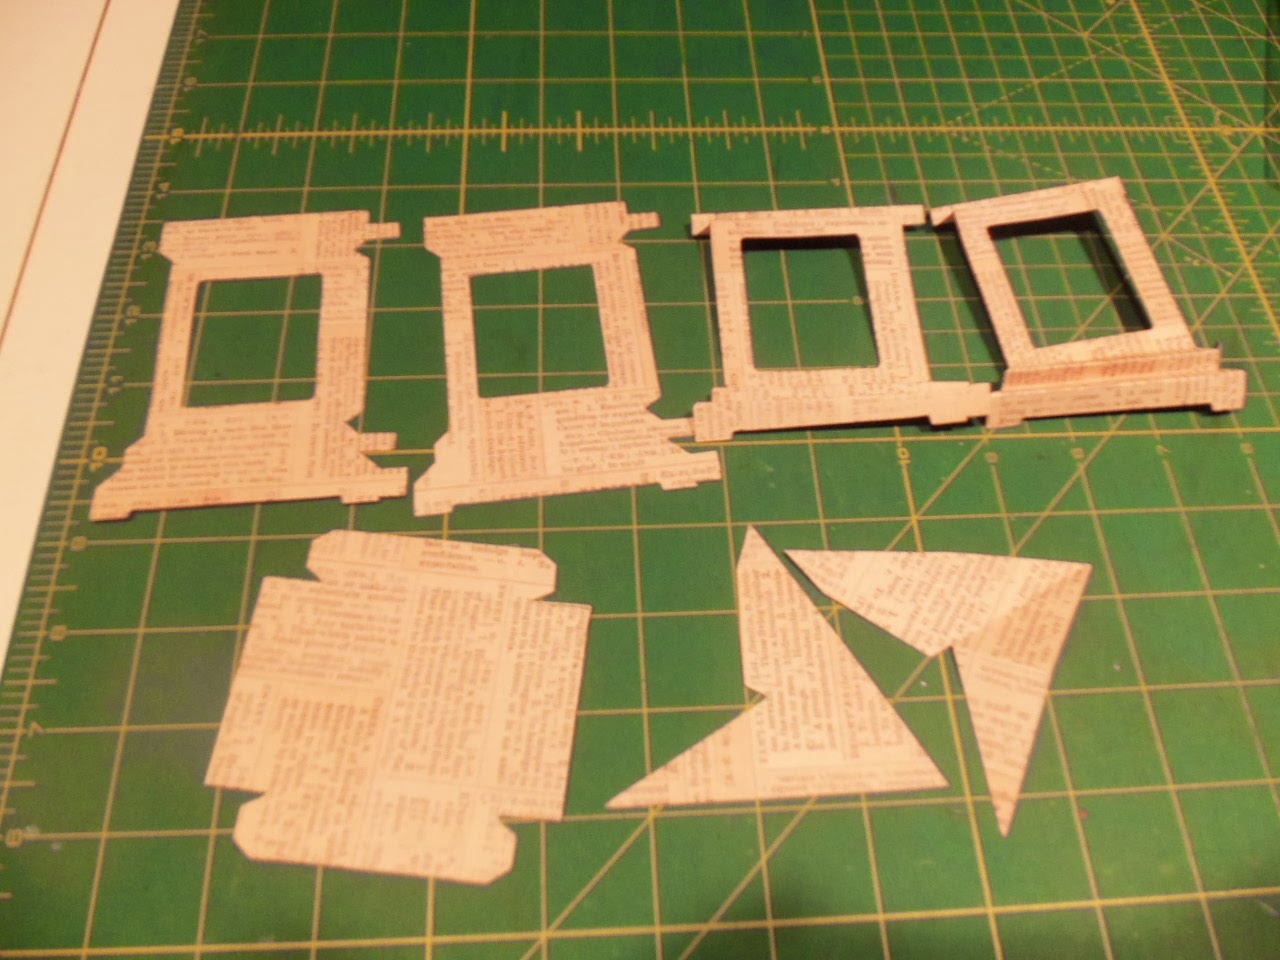
First you need to use your Big Shot and the sandwich for this goes, from bottom up, cutting plate, paper, die, and crease pad. No top cutting plate is needed. Take extra care that your blades in the die are NOT next to the crease pad. And for this die you will need the extended cutting surface. Cut four of the sides, two of the roof and one base.
I think it's helpful to have one of the sides made from a scrap in front of you to remind you (visually) of how the creases or folds go.
As for supplies, I was constantly using my bone folder and a small ruler. If you can't see the crease line, and depending on the print of the paper it might be hard to, you can use those to re-crease the folds. Also you can use whatever adhesive you like. I used a quick drying adhesive, Sookwang tape, and a glue gun with a very fine tip. Joann's --like $5.
First I do the base which is just like making the lid of a box. Four equal sides with small tabs to glue and adhere to the edges. Put aside.
Then I would do the roof. The large point on the roof is a "valley" fold. It goes down. The other two creases on each roof piece turn up, a "mountain" fold. Each half has a tab on one side. You join the two and once you do that you just sort of bend it into the shape it needs to be. It looks confusing but it's not really. Set the completed roof aside.
Now you are ready for the sides. Take a deep breath and maybe a break here! When you start to do your folds or creases on each side, after you fold a set of them, use your bone folder to give a good sharp crease to each SET of folds. I found this to be a big help.
As you start to glue your sides together it's impossible to glue the long side seam plus the seams and tabs at the top and bottom. So just start with the long seam and do that first. Then you can do the tops and bottoms after. In the first photo below you see the one side ready to go with tabs folded in and then doing the long seam on the corner first. Then you can do the tops and bottom corners on each side. I find it's easier this way but you do it whichever way you are comfortable.
Finally you can finish all four sides then add the roof. I just put a dot of glue on each corner of the top and set the roof in place. The pics below show what I consider to be a "good" base corner and a not so good one.
Now you can decorate to your heart's content. Hope this was helpful in case you want to try it. I wouldn't shy away from it because it gets easier the more you do. And while this came out at Christmas as a holiday luminary, it makes a great Halloween lantern, a spring or easter theme and a patriotic theme as well. I can think of all kinds of occasions it would lend itself to!


3 comments:
Your directions are well written and carefully explained.
You are honest and straightforward about the challenges associated with the making of the luminary.
Your finished luminary is so pretty...love the velum windows.
The flowers you used on the finished project are a nice touch.
If it's OK with you, I'm just going to sit here and admire your work!
Thanks for sharing this, my friend!
xoxo
Joyce
Wonderful and clear cut tutorial...I can see you spent a lot of time putting this together! Whenever I get this die, I now know where to come to get instructions...thanks for sharing...and inspiring!!
Hi Mary, I've followed your pins since the very beginning of pinterest. Feel like I've know you forever-haha, but just today figured out you have a blog. I look forward to visiting it as you have the most fabulous pins. -Betsy PaperCalliope.com
Post a Comment