Tuesday, December 28, 2010
All Over For Another Year
Well the big day has come and gone. I spent yesterday taking down the tree, packing all the interior decorations away, unloading a few on the side to go to Good Will, and cleaning house. A wonderful feeling. I am always excited to put the decorations away and I start organizing all my closets and pitching stuff . Then I go through the studio and pull stuff from there I'm never going to use. I ususally let it accumulate in boxes and then take it to our church flea market in the spring. We're laying wood floors on the second floor of our house and all the furniture had to be moved so it's a perfect time to clean out. I love the feeling of starting the New Year "unencumbered" with life's detritus. Anyone else feel the same?
Thursday, December 23, 2010

I had a hard time selecting an image from all the vintage Christmas ones I've saved over the years. They're all lovely but my heart, my very being, is drawn to the Nativity scene. All the shopping, cooking, preparation aside, this is truly what this season is about. I abhor the commercialism. Give me some beautiful Christmas music, lights (I do love lights!), and Christmas mass and I'm content. My family doesn't always understand my aversion to Christmas the way the world celebrates. But I have to be true to my upbringing and myself. I don't remember too many gifts as a child but my parents had a wonderful large Nativity that went up. The building must have been 2' by 3' and the figures 12" to 15" tall. It was magical. This reason for the season was ingrained in me at a very tender age. This tiny Child in such a pathetic setting came to bring peace in the hearts of men, not crowds in the mall. He came to save us, not a sale at Macy's. He came in a humble way to remind us where our hearts should be centered. If we but calm ourselves and listen, we will hear Him whispering our name. It is my fondest wish for all of you out there to celebrate with peace and calm, love and joy, and the blessings only this season can bring.
Wednesday, December 15, 2010
Another Great Blog to Follow for Zentanglers and Quilters
http://janemonkstudio.blogspot.com/ Be sure to give Jane Monk's blog a look-see. She is a beautiful long armed quilter as well as a certified Zentange teacher. She does lovely work in both media.
Tim Holtz Product Giveaway!!!
http://yoursartfully.blogspot.com/ Check out this blog for a chance to win a wonderful grouping of Tim Holtz products. My fave.....
Monday, December 13, 2010
Christmas Swag


I fell in love (as did many of you, I'm sure) with the November release at Papertrey Ink, in particular her banner stamps and dies. What an easy and creative way to make this popular decorative item. I kept my first one pretty simple and just wanted to share it with you. I used SU Kraft and K & Co. Glad Tidings DP. The snippet of music paper was a single sheet I picked up somewhere ages ago. The large rosette was made with the Tim Holtz die and the smaller ones were also K & Co. The letters that spell out Christmas I got at Michaels, pre glittered. I had no place in my studio to photograph the complete swag because my studio is in a state of pre-Christmas chaos so the pics were the best I could do. You'll get the idea I'm sure. Remember to click to enlarge to see detail closer. Enjoy!
Friday, December 10, 2010
ODB Small Ornaments


Here are two cards made with the small ODB ornament stamp set and the Spellbinders Heirloom Ornament dies. Background is SU cardstock. DP is a flocked paper from Anna Griffin and the glittery pink DP is from a birthday card I received last month! Recycle! Both were colored with Copics and highlighted with Stickles. White satin ribbon was used on both. On the pink card I stamped the image several times so that I could cut apart and layer the center of the ornament. Have a great weekend everyone!
Ornament Cards


I always feel like I'm the last person to hop on a "trend" and one of this season's biggies is the Spellbinders Heirloom Ornament die. So many companies have designed stamps to fit this die. I finally ordered this beautiful Ornament set and the dies from Our Daily Bread. I love to color and these were really fun. I used Copics and lots of Stickles to highlight. Most papers were older K&Co. The images themselves were stamped on watercolor paper. I used two Martha Stewart punches and some gems. I have another post coming on the smaller of the two ornaments in this stamp set.
Thursday, December 9, 2010
Check it Out! Ho Ho Ho!


I just had to share this find with you. Is this not the cutest thing you've ever seen! These santa clothespins were in Michaels. A package of ten for less than $2 because they were on sale. I colored him with Copics and used DecoArt's Outdoor Snow in a jar for his hat and beard. Just barely brushed it on with a tiny little stencil brush. Quick and easy but a nice touch for a gift or card or stocking. Now everyone run off to Michaels and buy santa clothespins!
Wednesday, December 8, 2010
A gift for me.........(for a change)


I decided I needed to make something for me for a change since most things I make are gifted or given away. I've had the sweatshirt ready for ages. And I was determined to make this with only fabrics from my stash and I did it! You cut the sweatshirt apart, cut the front in half so you are working with 2 fronts and a back. You remove the sleeves. You need half a yard of 8 different fabrics close in color value. You make two strip sets, four fabrics in one and four in the other. Then you cut the strips apart into blocks and arrange them on the right side of the shirt. Sew the rows together. Pin to the sweatshirt and machine quilt. Sew the sleeves back on and bind the edges. If you are a quilter this is clear as crystal. If not, you have no idea what I'm talking about. Hopefully the pictures will help. This is about the 6th one of these I have made.
The lighting doesn't seem to show the colors very well but be sure to click on the pictures and even double click to get a birds eye view of what's going on. Makes me want to do another one now!
Wednesday, December 1, 2010
Christmas Gift Purse


I have a cute little purse for you today. I purchased the template from http://www.inkingoutofthebox.com/. She has several very nice and reasonably priced templates for sale. This box has an unusual shape and I used my newest paper collection I picked up at Michaels during the weekend after Thanksgiving on SALE! It's by Anna Griffin and is soooooo elegant. The base paper is flocked pine cones. The other two papers are in the coordinating pack. The label/sentiment is from an old set by K&Co. but the colors were perfect. The scalloped edge is an EK success punch. The ribbon is a green twill tape I purchased years ago. It's a very roomy box inside. I took a pic on the tree as well as on my sewing table so you could see the colors clearly. I hope you like it!
Monday, November 29, 2010
Simple Elegance

To me this card is elegance personified. The stamp is Christmas Wreath from Flourishes. It was in last year's collection. I did this in the past and glittered the berries and the balls (or fruit, however you wish) but this year I just colored and shaded with my Copics and a Spica white pen. I tried to use very traditional Williamsburg colors as you would see in their florals. The white background was embossed with a Cuttlebug folder and layered on Cherry Cobbler and Garden Green from SU. Hope you like it. These large images are so much fun to color.
On your mark, get set, go...............!!!!!


I sure hope everyone had a wonderful Thanksgiving. Our dinner was delicious and we enjoyed the relaxing atmosphere. Did you get out on Black Friday? You wouldn't get me in a mall or store on that day for all the tea in China! I did get out on Sunday to make a run to the craft stores, the library, and Staples so I was happy.
The little box pictured is almost 6" square and the cutting file is from SVGcuts.com and is part of their Christmas box set. There's a tree shaped box, a pillow box, a star box, etc. This one is the lacy box. I cut it on my Cricut and as is always the case with their files, it went together like a charm. Even the BOW comes in the file. What fun! This would be a great box for Valentines too as there is a heart as part of the lace. The paper was from a Christmas pad by SEI that I bought last year. All teals and cardinal red. Very nice to work with. Well I hope you have a great week and get a lot accomplished. I put up the tree over the weekend and other than outdoor lights that's about it for us. We're kind of getting minimalist in our old age!
Wednesday, November 24, 2010
Happy Thanksgiving

I just wanted to take a few seconds to wish everyone out there in blogland a Happy Thanksgiving. Enjoy your meal and the precious time spent with family and friends. Even in the midst of our troubles and problems (and everybody has them!) we in this country have much to be thankful for. Try to take a quiet moment during this day of thanks to remember God's loving care and how He showers us with blessings each and every day. Have a wonderful day!
Tuesday, November 16, 2010
Christmas Cards and Layers of Color
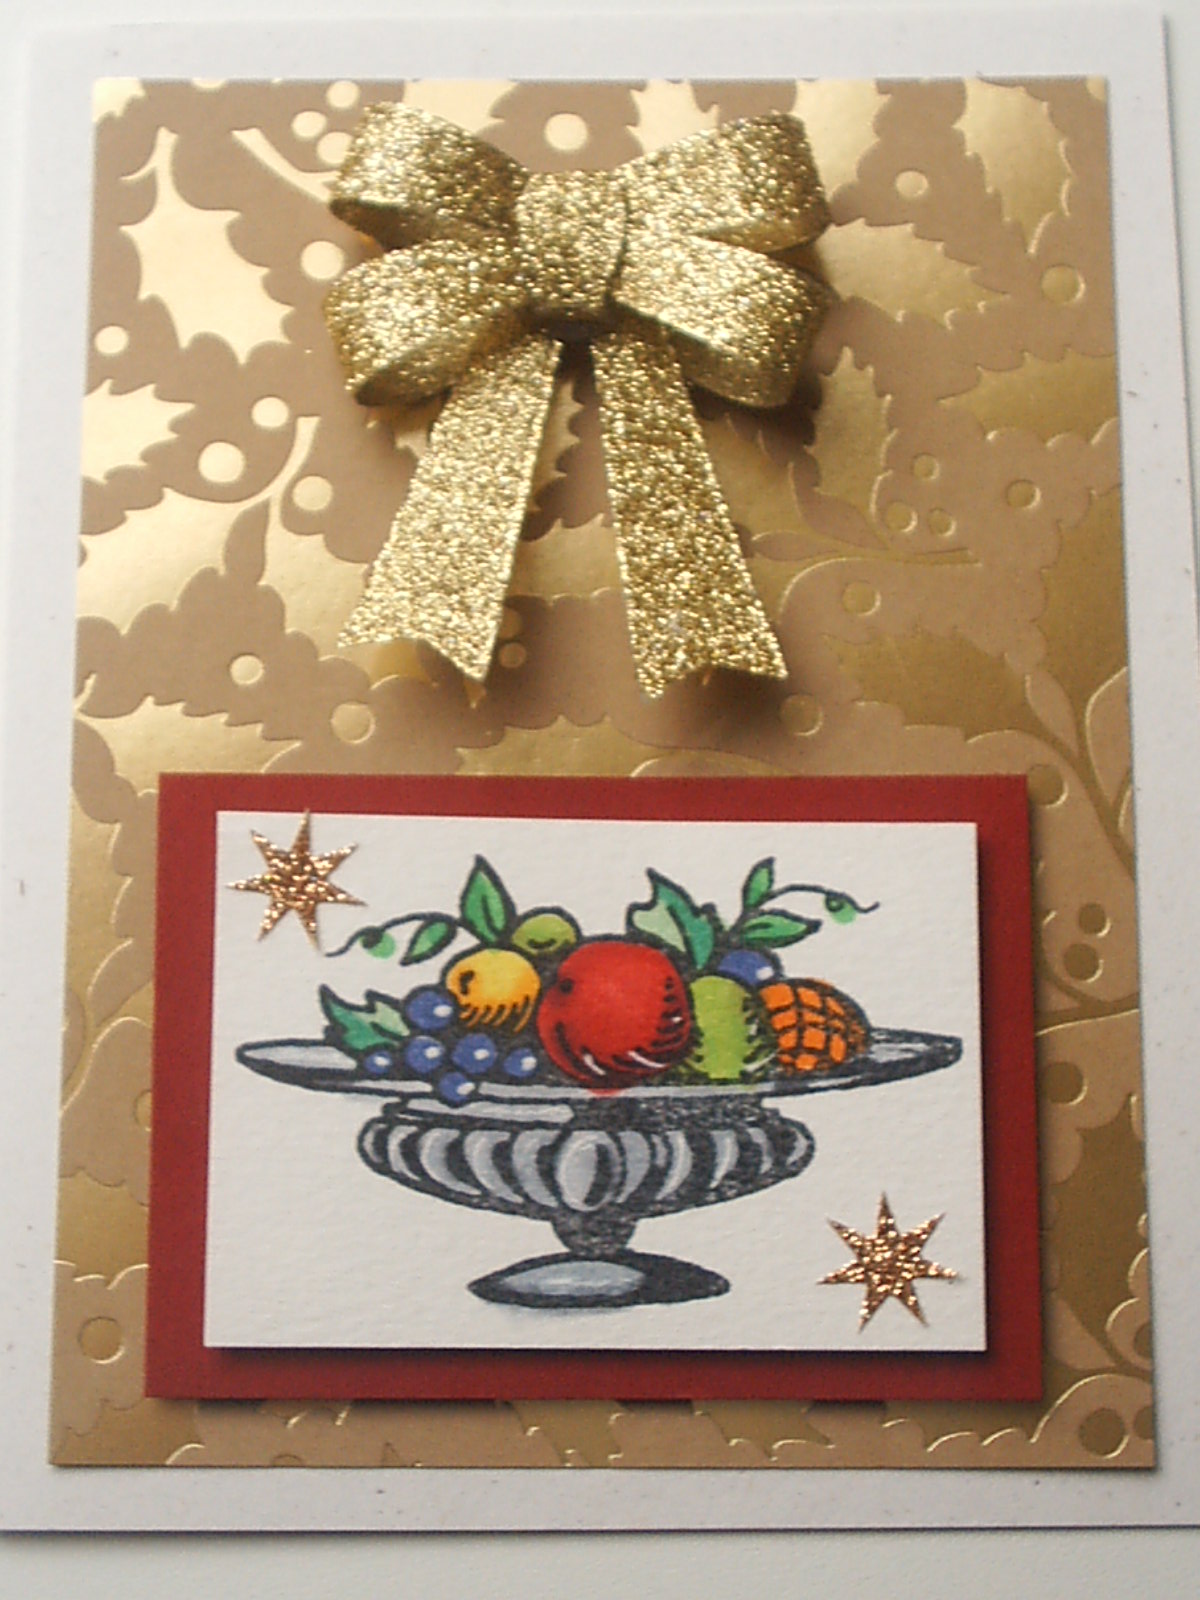
 I came across a new (to me anyway) stamp company called Layers of Color. They have yummy stamps and they are clear so it's very easy to see when you are joining stamps as in the first card. I think this image is just gorgeous. I colored all the images from this set with Copics and added Stickles for some glimmer. A Martha Stewart punch was used on the first one. All the papers for these cards are K & Co. I used Nestabilites on two of them along with some K & Co. embellishments and some very nice little glittered bows from Michael's that I snatched up after Christmas last year. If you have any other questions, send them along. I'm always glad to hear from you. BTW, the stamp set is called Fruitful Harvest by Layers of Color.


Monday, November 15, 2010
Heads Up for Creativity!
http://destinationart.net/blog/?p=3273&cpage=1#comment-783 This is a must visit blog for creativity and design. These girls really know their stuff. They're also having a great contest to celebrate!
Sunday, November 14, 2010
Traditional Red Carry It Box
This box was made from SU's new Cherry Cobbler, a luscious red, and Very Vanilla. The DP I think is K & Co. I used Lauren Meader's template for the box and the label. Gold Stickles on the sentiment and a little on the flower with glittery gold leaves. I also added an extra folded strip of cs on the handle to make it more sturdy. I thought it needed it because the handle gets bent back and forth pulling it through the slit in the lid. Hope you like it! Enjoy your Sunday!

Friday, November 12, 2010
Soft Pastels for the Holidays


I'm loving these soft colors for Christmas, although having been in the retail stores, red and green is definitely "in" for this holiday. This is the Carry It template again in SU Blush Blossom. It looks really peachy but it's actually a soft pink. I dressed this one up on all four sides with some old K&Co. paper. Again I used the Secret Surprise Label with an SU Holiday Best sentiment in SU Old Olive ink and metallic cardstock in the palest green for the leaves. And I am loving making these crinoline roses (see my post further down). A touch of stickles on the flower and pearls on the label. Done!
Thursday, November 11, 2010
Christmas Is Coming, The Geese are Getting.......


Well, hi there! Christmas spirit is in full swing it seems, both in the retail form and in stamping and papercrafting. This little gem is Lauren Meader's new template Carry It. It makes a very nice size box for giving a small gift, cookies, chocolates, gift cards, bath items, and whatever else you can think of. I used a very pale aqua blue, seems to be around everywhere this year. It's sort of a robin's egg color. The flower is made with crinoline with some stickles to highlight and the leaves are a Sizzix die cut with metallic paper. The label is also from Lauren and it's called Secret Surprise label and it is one of the prettiest I've ever seen. I made one layer of off white edged in Baja Breeze, another layer from DP, and yet another layer cut with Nestabilities Nine with a stamped sentiment from SU's Holiday Best stamped in Baja Breeze. A little white and silver ribbon to give it the feel of a wrapped gift.....done! The box is approximately 4 x 3 x 5 not counting the label and can be cut with the Cricut or by hand. See you again soon with another version.
Wednesday, November 10, 2010
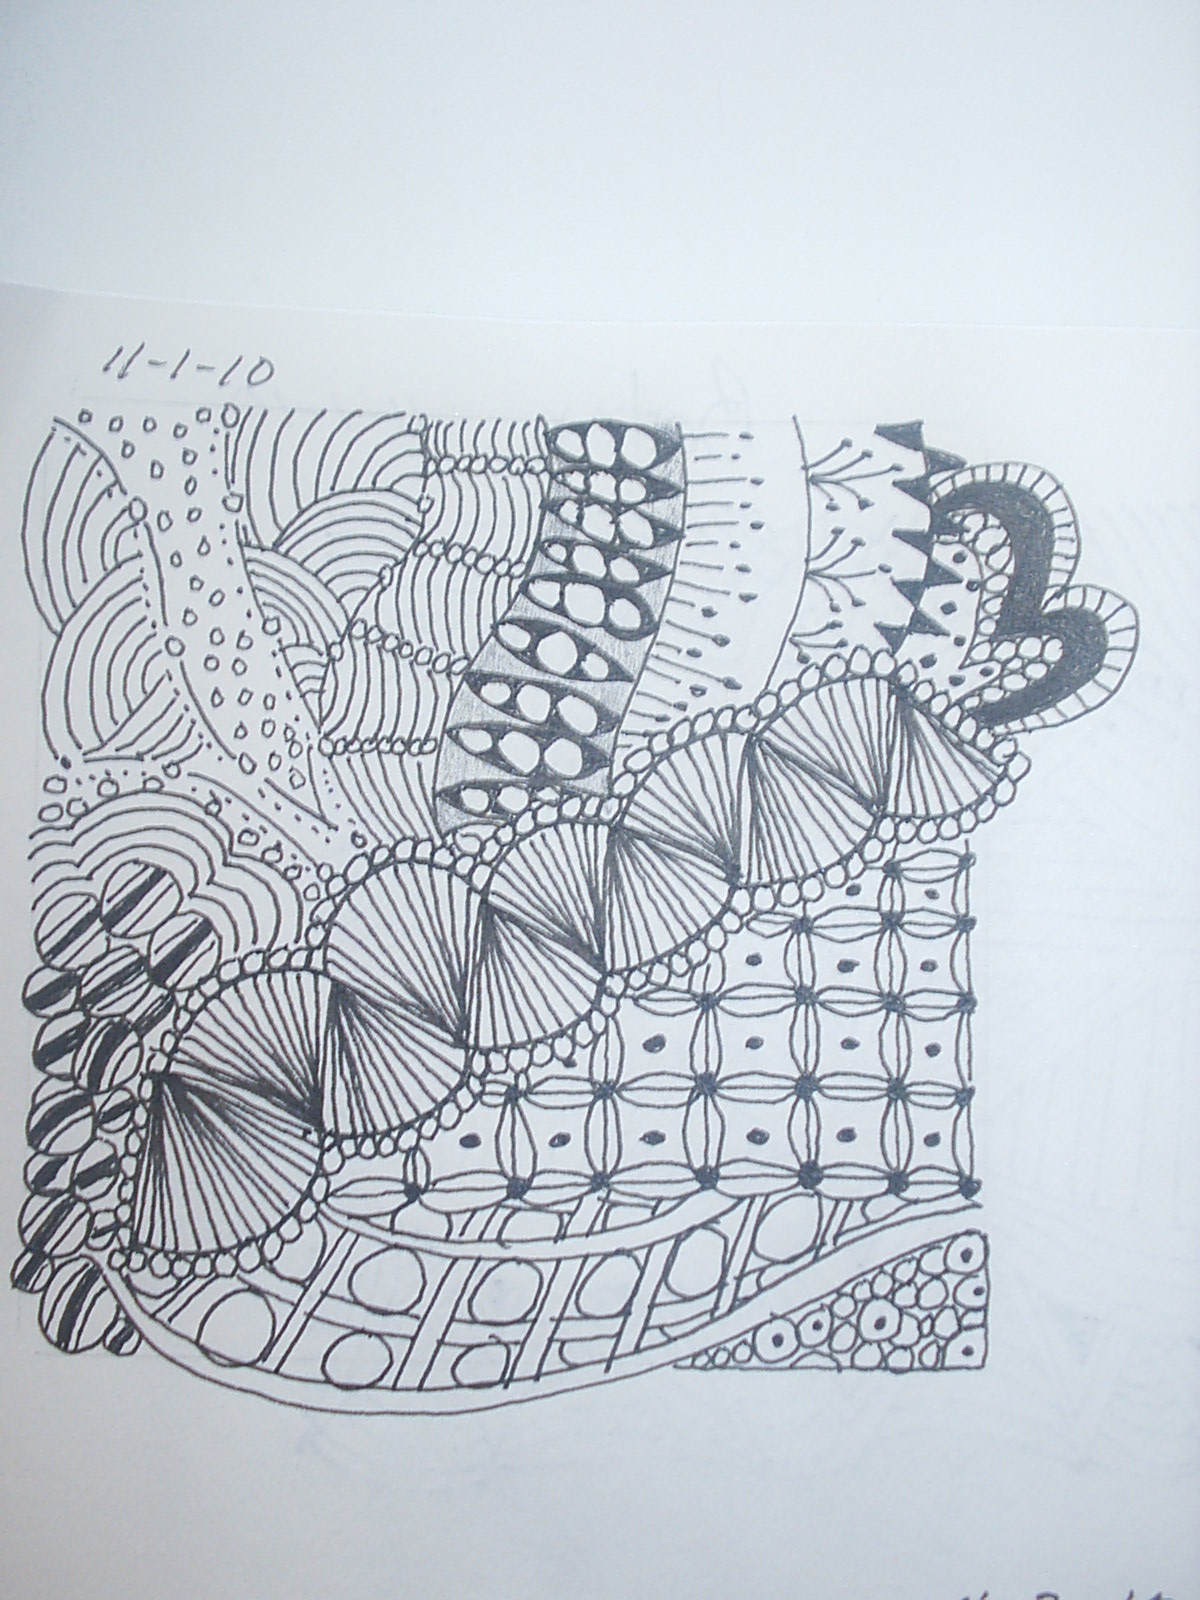
My Soft Comfy Bed Is Calling.....

......but I had one more tangle I had to do. This is actually three "tiles" I drew overlapping and then tangled them. All sort of patterns here, some shading. One of these days I'm going to do like an 8 x 10 one. Won't that be something......well, it will for me! Good night all!
Christmas Ornament

I saw this ornament on a blog called Bellisima Vida. http://bellisimavida.blogspot.com/ It's 6" across!! You start out with two 2 and 3/4" strips, folded at every 1/4" (get out your MS scoring board of Scorepal), fold and adhere to a 1.5" circle on each side. Over that cirlce I cut a 1 and half inch decorative circle and finished with Prima poinsettias. Any center treatment would work. I also colored the edge with marker. You could embellish the edge with heat embossing and dip it in glue then glitter. Attach a gold string through a tiny hole in one pleat and you're done. She gives directions for two sizes.
Sunday, November 7, 2010
Star Box #3


I purchased some more 12 x 12 heavy paper to make another Star Box. This was Co-ordinations White Wash paper. It's textured and very heavy so it was great for a box. I decided to go sort of shabby, vintage-y. I barely edged the box with Vintage Photo ink, then covered the lid with distressed glitter. I spent this afternoon cutting out Tim Holtz reindeer, backing them with cardstock and distressing them also with Vintage Photo. The kicker on this one is the flowers. These are flowers made from......wait for it.....CRINOLINE! Yes, you remember crinoline from when we were little girls. Well JoAnn sells it by the yard and I marched myself up there to get some because I had seen Tammy Tutterow's blog post on making these flowers. Check it out here (http://tammytutterow.typepad.com/tammy_tutterow/2010/11/tutorial-crinoline-tattered-roses.html). They're so beautiful and if you follow her directions you should do fine. My second one was better than my first. I used Glimmer Mist to color mine, two large ones and two small ones from the TH Tattered Flowers die. Perched on top is the reindeer also covered in sheet music (which you can't see!) and distressed glitter. The bottom of the box is stamped with a small snowflake in Vintage Photo. I love how it came out. I think there are more of these boxes in my creative future. Have a great week everyone!
Calling all Alice in Wonderland Lovers!!!
http://alteredalice.blogspot.com/2010/10/blog-candy-from-donna-printers-tray.html You know I always like to let you in on something great so I want you to take a quick blog trip to The Altered Alice. If you like Alice in Wonderland you will love this site. If it doesn't tempt you to make something "Alice", your money will be refunded (*wink). I just found this quite by accident this morning and wanted to share all the fun!
Saturday, November 6, 2010
Gypsy Inspiration

7 Gypsies have these wonderful trays that you can do anything with. See my post on the Halloween one I did. This one is all gussied up in the Steampunk Debutante paper from Graphics 45. I love, love, love their papers and can't wait for the new Spring one with fairies to arrive. Please make sure to click on the picture to see everything up close and personal. I don't consider this piece finished as I want to add more doo dads but for now this was all my meager stash of goodies could provide. It needs more metal junk, so I'll keep scavenging. The lightbulb in the lower middle section was cut from paper and covered with Glossy Accents. I'm not sure it looks like glass on the phot. The watch workings on the lower left were found when we cleaned out my MIL's house. I made the Perfect Pearls bling in the upper right. Fun technique! Hope you enjoy your weekend. It's beautiful here. Sunny and cool.
Friday, November 5, 2010
Just Like Peanuts!


Just like peanuts, you can't stop at one! Here's another of the Star of the Show gift boxes. This time I did it in solid color paper and used a print paper for the poinsettia. I highlighted the poinsettia with Stickles and the leaves are Prima. I used red rhinestones for the center of the flower and the tag is done with the Long Scalloped Nestabilites. The sentiment is from Vintage Christmas by Crafty Secrets. Don't hold your breath.........
Mojo Returns.....I Hope!!!


I was determined to make SOMETHING today. And I was inspired by Lauren Meader and her wonderful new template Star of the Show, a star shaped box in two sizes cut on my Cricut. I also used her Perfect Poinsettia and Holly Days cut files for the flower and leaves on the top. I cut the flower and ran it through a cuttlebug folder and after gluing all the layers together I edged with Stickles. The tag is a PTI stamp from a set of the same name. And I added a little ribbon and buttons and bling. The box paper is an Anna Griffin paper with poinsettias on the paper. Hope everyone has a wonderful weekend!
Wednesday, November 3, 2010
Zentangles---Taking Over!
 Zentangles seem to be the only thing I can do lately. I am suffering from serious papercrafting withdrawal but can't seem to motivate myself to begin a project. There are too many possibilities!!! Do I do something Tim Holtz, make Christmas cards (of which I only send a precious few), make a scrapbook page, make some embellishments like paper flowers, etc---I can't decide and it's paralyzing. Can any of you relate! We have soooo many possibilities in the art world today and so many fabulous supplies, I find it daunting to decide which to work with. Whereas zentanges require only pen and paper. Voila! Problem solved. But I want to get back to stamping as well---and also I'm missing sewing and embroidery. If any of you out there have any cures or motivators for this problem, leave a comment. I'd sure like to know how others deal with this issue! Meanwhile, enjoy the tangles.


Subscribe to:
Posts (Atom)