Friday, February 28, 2014

Playing With Blocks......well not really...

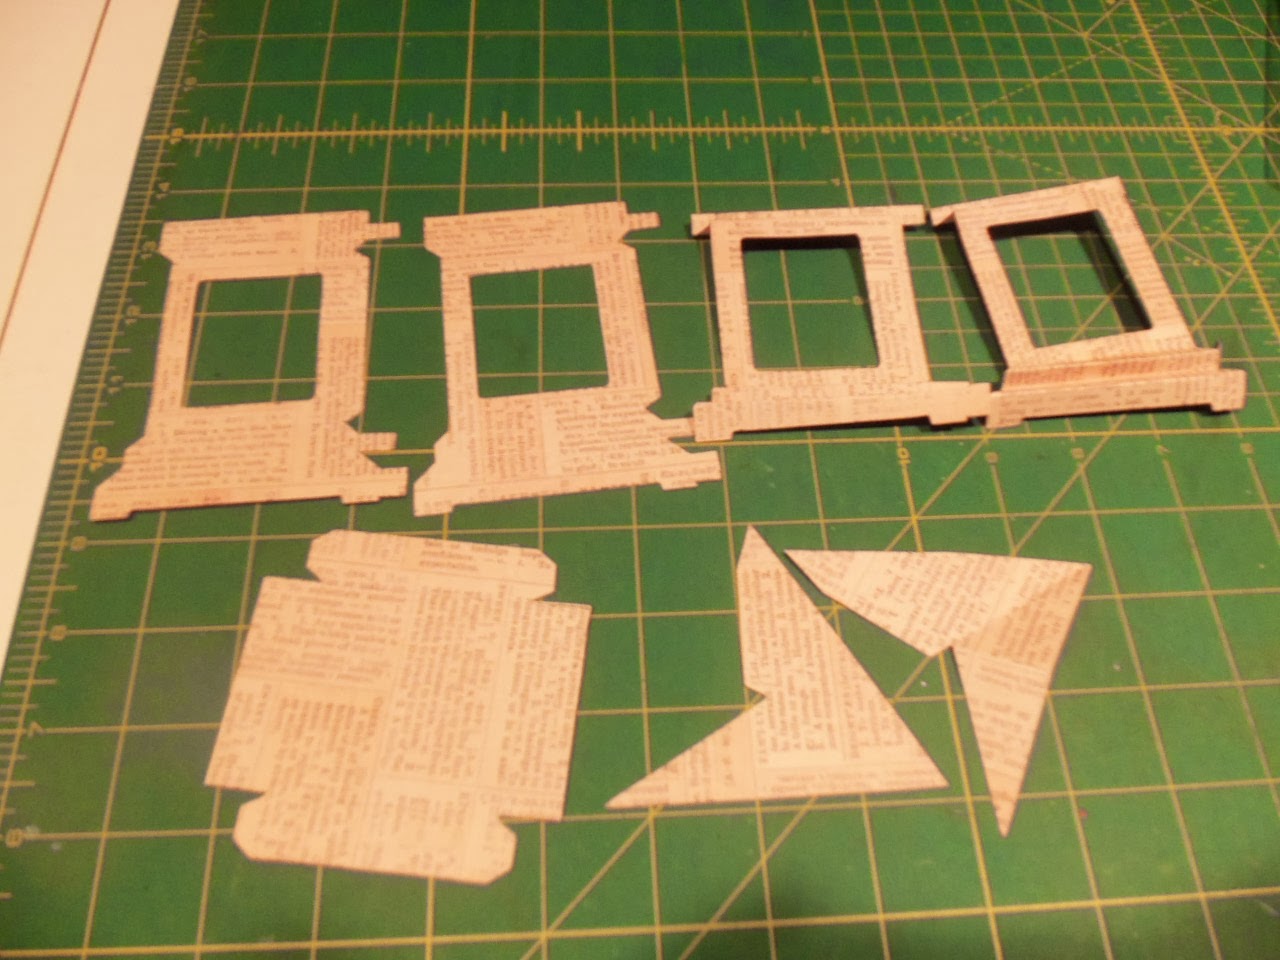
Don't know if you've noticed the new "block" cards on Pinterest.  It only takes part of a 12x12 sheet of cardstock and a small amount of designer paper to make one.  Very thrifty!  Of course all the doo dads you add is something else.  I must not be blessed with three dimensional vision because I had this all put together and kept looking at it thinking I did something wrong.  The directions on You Tube were perfect.  But when you're finished, you sort of have to turn it up and over and then you see it! Ta Da!  So here are some pictures.

The first picture shows the "blocks" with all their little "fussies."  I used a Kraft paper and the new Tim Holtz Wallflower paper.  It is his most beautiful paper ever and very cleverly done so you don't waste any.  You need 15 little squares of DP to do this.  On the top step is a bee looking down at the flowers and leaves on the middle step. To the left is a clock and below all a Tim Holtz saying "Live in the Moment."  The bottom step is a teeny tiny paper doily stamped from PTI and inked with Vintage Photo. My little brass teapot and the tiny tea cup and saucer have been in my collection for a long time.  Don't even know the source but I knew I'd find the right project for them someday.  That's why we crafters pick up things as we go along.  It's not that we need them NOW, it's for LATER!!  LOL!


This shows the back of the blocks with a tag with a Tim Holtz saying on it.  Everything was distressed on the edges with Vintage Photo, my favorite Distress Ink.  For stability, I also used Tim Holtz metal corners on the bottom  And here's the surprise:


The whole thing is open and you can see through from front to back. The directions do not call for lining the inside with paper but I did anyway.  I'm a glutton for punishment.  The AMAZING thing about this whole thing is that it all folds flat for you to send in the mail.  Now before you ask how, I chose not to do that with this piece because I wanted to display it.  But the You Tube directions have you do all the cutting and then folding and gluing, lay it FLAT, put your pretty paper on, and then fold flat for sending.   It's really amazing that it folds flat!  You can use flat embellishments like a small bow, ribbon, flowers etc. if you want to mail yours.  And on Pinterest also there is directions for an envelope for it to go in.  The link is 

http://www.youtube.com/watch?v=4H6Kveu0ctc&feature=share

And someone sent me a funny group of cartoons and photos with jokes regarding senior citizens and the one below just made me fall off the chair laughing.  This is for those of you (like me) of a certain age who will appreciate it.

Hope you all have a wonderful weekend and find some time to be crafty!  Thanks for stopping by!

I have entered this project in:

http://qkrstampede.blogspot.co.uk/2014/02/qkr-stampede-challenge-77-anything-but.html
and
http://cardmakinmamas.blogspot.com/2014/02/cmm81-stack-it-up.html
and
http://sassystudiodesigns.blogspot.com/2014/02/dtbst-218-flip-or-fold-it.html
and
http://7kidschallengeblog.blogspot.com/2014/02/challenge-94-anything-goes.html
and
http://www.inklingsandyarns.com/2014/02/inky-linky-46/
and
http://stampwithsarahkay.blogspot.com/2014/02/challenge-206-anything-but-square.html
and
http://www.wordartwednesday.blogspot.com/2014/02/challenge-121-anything-goes.html

Friday, February 21, 2014

An Honor

I was approached by the Weekly Scrapper to give them permission to post a project I did some time ago....the steampunk accordian album.  Here's the link if you want to take a look.  It was posted 2/19.
http://weeklyscrapper.com/steampunk-accordion-mini-album/.

SALE: Ebay

Just thought I'd let my readers know that I'm having a big sale of quilting, papercrafting, clay and other craft books on ebay.  Stop by to see if there's something you can't live without!  Here's the link:

http://www.ebay.com/usr/primitiveseasons    Click on "Items For Sale"

Saturday, February 15, 2014

Another snow.....and more coming!

Boy, have we been having the "dig out" of the century.  A record snowfall here on the East Coast.  We couldn't even go down our street.  Husband was out with the snow thrower all morning.

I wanted to ask, take sort of a poll so to speak, if any of my readers  have a printer they especially love.  For printing vintage images my printer will not even take regular card stock paper without having a major digestive episode!! LOL! and there are some things I'l love to use photo paper or artist's paper.  One that feeds from the back would probably be good but I know they are more expensive and take up more real estate on your work table.  I'm not opposed to them as long as I know I'll get good images.  So I'm asking if you or your friends could tell me about a printer you like, the brand, cost, etc.  Any information would be appreciated!  Stay warm!

Thursday, February 13, 2014

The Nor'easter of 2014

We're digging out today here in Forest Hill.  We got about 14" during the night, then sleet and freezing rain and we are waiting for the next band of snow to bring another 2-4"  Just to give you an idea:


 The first pic is down the deck steps to clear off a spot for our doggie to do his thing which miraculously he did!  He doesn't care for not being able to see grass. And next you can see from the deck is my garden bench buried in snow.  The view from the front porch and the street hasn't been plowed yet.  And the swing on the front porch has a sign that reads "Simple pleasures are life's treasures."  This seems ironic today, yes?


Finally here's Sampson enjoying his usual daytime perch on my work table looking out the window.  Guess he thinks snow is a bore because he's falling asleep.  What a baby!  Stay warm and be safe!

Friday, February 7, 2014

Version 2 of the Easter Basket

This is another version of the stamp I used a couple posts down.  I stamped and colored two but using different colors.  This is a softer image.  The little punched strip behind the basket is from Poppystamps and is called Zig Zag Knit. It's such a nice die.  And my bow is another from the Zutter Bow It All.  I absolutely think this is one of neatest tools to come along in a long time.  I could never make bows but not any more.  This is just a simple one but you can do bows as large as 9" across, two layer bows, etc.  I haven't tried the more fancy ones yet.  I will tell you there is a slight learning curve.  I think I made 20 bows before I "got it!"  But it comes with an instruction book, a nice zippered carrying case and all the tools you need.  And there are wonderful videos on using it on You Tube.  The best ones are from Really Reasonable Ribbon.  Go to You Tube and take a look to see if it's something you might like.  It's a little pricey but if you can't make bows and like to use them on cards, wreaths, home decor, etc., then it's worth it!  Treat yourself.  PS:  I have entered this card in the challenge at http://rheddandrosies.blogspot.co.uk/.

Thinking.........

I think cards for a friend are my favorite kind of card to make.  You can think of the recipient while you're working on the card and then have something personal to send.  This little card uses SU paper and a Penny Black image and sentiment.  Joann's carries a lot of these cute little images on line and often have big sales.  I colored with Copics which I love to do...so much fun!  The flower is from Recollections and the little doily "leaves" use a Stampin' Up! punch.  I edged the sentiment and the doilies with a little Scattered Straw ink.  I just love her little teapot!  Have a great weekend everybody!

Wednesday, February 5, 2014

Ice and Easter Eggs

Well, we here in Maryland are undergoing an ice storm and its aftermath.  It looks lovely and delicate on the landscape but does quite a bit of damage and makes the roads all but undriveable.  What's a girl to do but stay in with a chai latte and make a spring-y card to lift the winter mood.

My card is 5 x 7 and I used Stampin' up! white cardstock.  The background layer was embossed with a Cuttlebug Dots embossing folder.  Then using a Spellbinders die I cut a larger circle from the card and a larger pink circle to adhere behind it.  The stamp for the main image is Easter Egg Basket from Hero Arts and the sentiment stamp is from Easter Basket by Flourishes.  I colored the basket and eggs with Copics and, I don't think you can tell, but the doily has a little Diamond Stickles on it.  The ribbon is an organza swiss dot tied in a multi loop bow I made with my newest toy, the Zutter Bow It All.  I can do a lot of things but bow making is not one of them and I've had various aids to bow making in the past but this is the best.  The delicate butterfly on top the bow is a Cheery Lynn die called Dripping Butterfly.  I added a little stickles to it as well.
Below are a few scenes I can see out my windows.....beautiful but deadly.  Stay warm.


I have entered this card in the Think Pink challenge on Classy Cards and Such.  Her link is http://classycardsnsuch.blogspot.com/2014/02/ccns-challenge-18-think-pink.html and http://rheddandrosies.blogspot.co.uk/ as well as http://pennyschallenges.blogspot.com/ and one final one 
http://whimsyinspires.blogspot.co.uk/2014/01/challenge-67-something-new.html.  This was also entered inhttp://craftyribbonschallenge.blogspot.com/ and  http://sassystudiodesigns.blogspot.com/.

Saturday, February 1, 2014

What can I say? I'm a girl who loves shoes!

Back at the holidays when I made the little ballet slippers for two friends, I cut out a pair for myself and they sat on my desk in the " need to finish pile."  Do you have one of those???  Anyhow these were cut from Graphic 45 paper, being careful to place the images of the ladies in the heel portion. The soles are covered with a coordinating paper.  The FUN part is decorating the shoe.  Oh my,  pull out all the stops!  I didn't want to repeat the lace I used on the Christmas ones so for a little softness this time, I cut a little doily in my stash in half and sprayed it with Perfect Pearls Mists, Sunflower Sparkle and three of Diane Reavely's Dylusions sprays.  I gathered it across the cut side and glued it into the toe of the shoe then embellished with flowers, Stickles, some bling, and, because I thought this whole project looked sort of French to me, I remembered I had these little buttons with the Trefoil design on them which I used in the center. Two types of ribbon, a satin and a grosgrain were used for the ties and then an old scarf pin in the center of the ribbon finished it off.  Hope you're like me and like shoes too!  Also I have entered these in the challenge for http://cardsgalorechallenges.blogspot.co.uk/ and http://craftyhazelnutspatternedpaper.blogspot.co.uk/ and http://catchthebugblog.blogspot.co.uk/as well as http://drunkenstampers.wordpress.com/. It was also entered in http://suzypantssmarty.blogspot.co.uk/ and http://www.totallygorjuss.blogspot.com/2014/02/challenge-221-sunny-colours.html and finally http://livelaughstamp.blogspot.co.uk/search/label/wordplaysaturday.  Also entered this in the Sunday challenge at http://pileitonchallenge.blogspot.com/.  I also entered in the challenge at  http://dawngdesigns.blogspot.com/search?updated-min=2014-01-01T00:00:00-08:00&updated-max=2015-01-01T00:00:00-08:00&max-results=8. Be sure to take a look at the work on all these sites.  Amazing!


Thursday, January 30, 2014

Have come across a really cool technique to add bling to your cards and pages very inexpensively.  No more buying swirls of pearls that cost $4 and more AND you may already have all the tools necessary for this technique in your arsenal.  I have to give credit where credit is due and tell you that this http://ideasforscrapbookers.blogspot.com/2011/02/easy-handmade-pearl-flourishes.html is where I first saw the idea for this.  Or you can find it on my Pinterest boards under Bling.

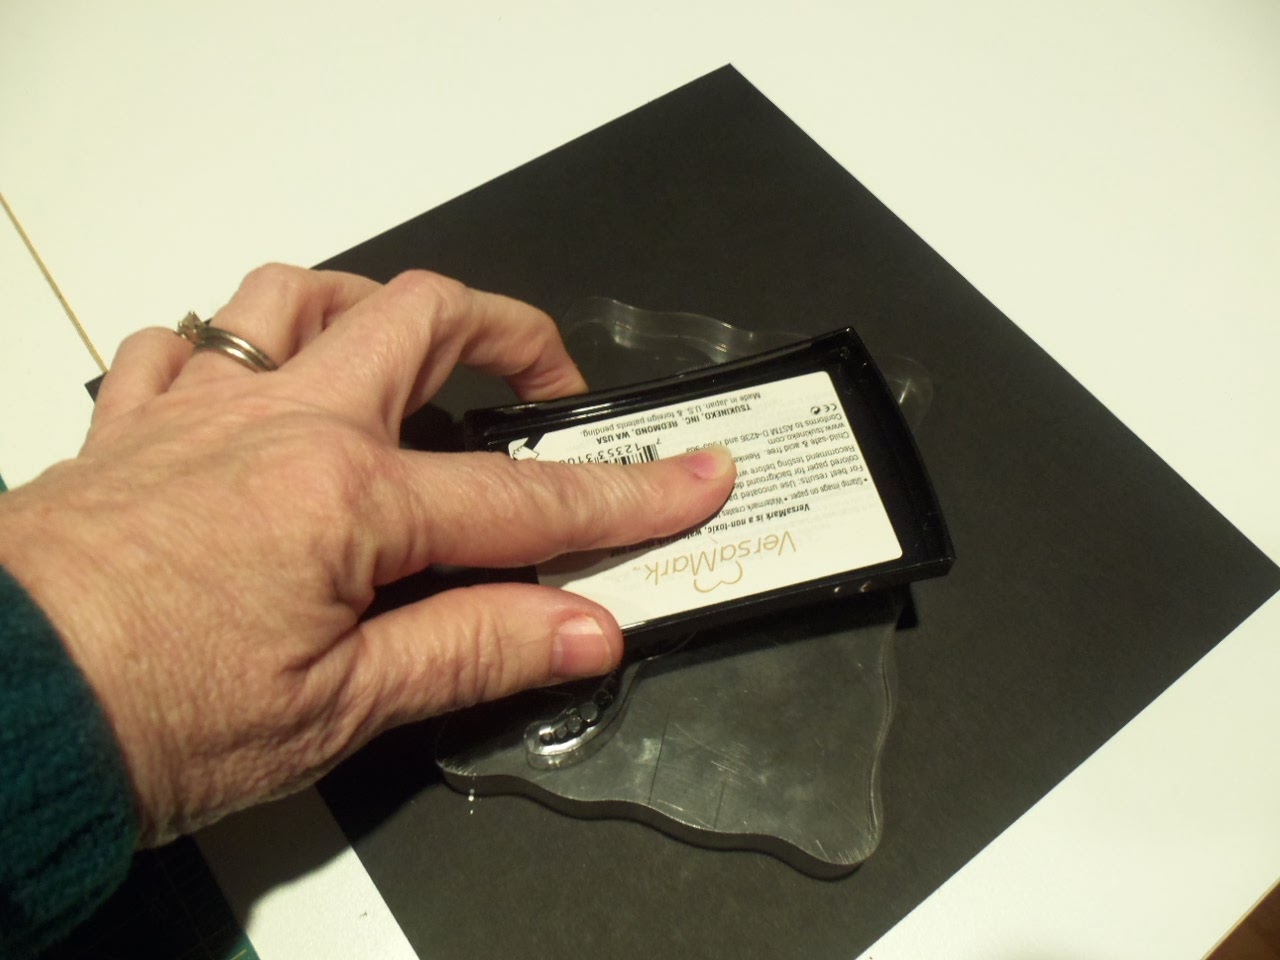
For this you need Versamark pad, paper, a stamp and either Viva Decor pens, Adirondack Dimensional Pearls, Liquid Pearls or even Stickles.  I'm sure there others you can use but these are the ones I am familiar with.  A note about stamps here:  stamps that are a flourish type are the ones you want to use.  Stampin' Up! makes many and there is a perfect one by Inkadinkadoo called Dot Swirls that is ideal. That is the one I'm using for the purposes of this demo.


HINT:  I have found that seeing the Versamark ink is easier on darker paper rather than lighter.  That's not saying you can't do it on white or light paper.  It's just easier on dark.  First thing you want to do is ink up your stamp with the Versamark.  You can use regular Versamark or one of the "colors" such as Versamark Champagne or Versamark Dazzle Frost or one of the others.  Stamp firmly on your surface giving it good pressure.  Remember, I'm just using a scrap to show you but you would be doing this right on your card, tag or scrapbook page.  The second picture shows what the versamark looks like stamped.  This is on green paper.

Then you start with your choice of whatever bottle of bling you want to use and you go along the lines and dot with small circles or dabs if you will of your medium.  The particular stamp I used has larger and smaller dots on it so I attempted to do that with the pearls I used.  I have found that Viva makes flatter dots and Dimensional Pearls and Liquid Pearls tend to make dots that have a "peak." There is a way around this.  You use to fingers to flick the underside of the paper GENTLY and the peaks will flatten.You can see the "post flicking" flatter effect on the second picture.

Then you simply finish off your swirls with dots of the pearls or whatever you are using and TA DA!  You're finished.  I have seen this done years ago where you laid a piece of transparency over a swirl design from a catalogue or book.  Then make your dots on the transparency and afterwards cut it out close to the swirls once it is dried.  In fact I used that method once or twice.  Problem is, it's a pain to cut out.  The transparency doesn't show too badly on your layouts.  But I much prefer this to that method.  You also can always use just a portion of your swirl...whatever you need to fill in your card of layout and make it look the way you want.  I hope you'll give this a try.  I found it to be a lot of fun!

Wednesday, January 22, 2014

Ding Dong, Ring that Patriotic Bell!

Remember I told you in my last post I had another luminary in the works.  I had this stamp set from Flourishes called Patriotism on Parade and it has this nifty patriotic bunting in it.  I could just see this in the luminary and an idea was born.  I think I FINALLY have this die and constructing it down pat.  Takes me awhile.....what do you want for 67 years old!!!

 Anyhoo, I stamped four of the swags, colored them with copics and used a Viva pearl pen to represent the stars.  I tried coloring in the stars with the blue around them.......way too hard for this girl.  The bell in the center actually rings and I've had it in my stash forever.  The red glittered flower I just picked up in Michaels sale bin....wish they had had more!  The little doo dad on the top that sort of looks like a firework (can fireworks be single???), was on a package from some fancy schmancy place I received for Christmas many moons ago.  I saved them....YAY!

 The key on the front represents the key to freedom which belongs to us....good old fashioned Americans.  Sometimes we lose keys (you know that feeling??) but we have to do all we can to hold onto this one.  I dedicate this piece to all those military families across the country, past and present.  My thoughts are with you.

This project has been entered in the challenge for
http://fairytale-challengeblog.blogspot.com/.  


Tuesday, January 21, 2014

On a snowy day......think spring!

Well it's coming down here horizontally and the wind is awful. Wind chills below zero.  Pretty to look at but only good for one thing----staying inside to papercraft of course!  Snow?  Love it and hate it.  Here's my contribution today:


I wanted to make another of these luminaries because since making the last one I discovered some important tips which might help you out should you try one.  I was having an issue with finding the right material to cut that would show the fold lines but still be easy to crease or fold.  This chipboard I got at Michaels this week.  They had all their paper, specialty and otherwise, half price.  Recollections makes it and though fairly lightweight it worked very well.  I also spoke with Sizzix on the phone and they suggested I try NOT using the Premium Crease Pad and just use the regular extended cutting pads---BINGO!  So much easier.  You might want to try this. All machines have their unique quirks and oddities.  Some may need the crease pad and others, like mine, not.  I just realized that I forgot to show you one of the sides.  They are all flowers, birds, nests, bugs etc.  This piece was entered in a challenge at   Papertake Weekly.  Now that I think I have a handle on this die, I have an idea for another one.  Stay tuned!

Monday, January 20, 2014

A Challenge!

I entered the card below in the Shabby Tea Room challenge for this week. Check out their blog at  http://theshabbytearoom.blogspot.com/ and papercrafterscorner.com.    They have some really lovely projects there.  My friend Diane Hover has been bugging me to enter some challenges so here's my effort for this week!  Thanks for the push Diane!  The challenge required you to enter a project with white/cream, red, green, silver and a bow.  I used the IO snow globe die and evergreen branch die and the Spellbinders Radiant Rectangles.  Wish me luck!


Wednesday, January 15, 2014

Luminary Tutorial......let's call it help with the luminary!

Since this is such a work intensive project I thought I'd give some helpful hints on issues I found quirky putting this together.  In the last post we already talked about what material to use.  In the meantime I tried cereal box weight chipboard and the backs of some old Stampin' Up! pads.  Neither worked......they are too stiff to crease and the creases are the bugger about this IMHO!

First you need to use your Big Shot and the sandwich for this goes, from bottom up, cutting plate, paper, die, and crease pad.  No top cutting plate is needed.  Take extra care that your blades in the die are NOT next to the crease pad.  And for this die you will need the extended cutting surface.  Cut four of the sides, two of the roof and one base.

I think it's helpful to have one of the sides made from a scrap in front of you to remind you (visually) of how the creases or folds go.
As for supplies, I was constantly using my bone folder and a small ruler.  If you can't see the crease line, and depending on the print of the paper it might be hard to, you can use those to re-crease the folds.  Also you can use whatever adhesive you like.  I used a quick drying adhesive, Sookwang tape, and a glue gun with a very fine tip.  Joann's --like $5.


First I do the base which is just like making the lid of a box.  Four equal sides with small tabs to glue and adhere to the edges.  Put aside.


Then I would do the roof.  The large point on the roof is a "valley" fold.  It goes down.  The other two creases on each roof piece turn up, a "mountain" fold.  Each half has a tab on one side.  You join the two and once you do that you just sort of bend it into the shape it needs to be.  It looks confusing but it's not really.  Set the completed roof aside.


Now you are ready for the sides.  Take a deep breath and maybe a break here!   When you start to do your folds or creases on each side, after you fold a set of them, use your bone folder to give a good sharp crease to each SET of folds.  I found this to be a big help.
 As you start to glue your sides together it's impossible to glue the long side seam plus the seams and tabs at the top and bottom.  So just start with the long seam and do that first.  Then you can do the tops and bottoms after. In the first photo below you see the one side ready to go with tabs folded in and then doing the long seam on the corner first.  Then you can do the tops and bottom corners on each side.  I find it's easier this way but you do it whichever way you are comfortable.


Finally you can finish all four sides then add the roof.  I just put a dot of glue on each corner of the top and set the roof in place.  The pics below show what I consider to be a "good" base corner and a not so good one.


Now you can decorate to your heart's content.   Hope this was helpful in case you want to try it.  I wouldn't shy away from it because it gets easier the more you do.  And while this came out at Christmas as a holiday luminary, it makes a great Halloween lantern, a spring or easter theme and a patriotic theme as well.  I can think of all kinds of occasions it would lend itself to!